
Since then Ive painted the black parts and given the whole hull a wash of 1:1:1 water ogryn flesh and badab black where I was carfeul to paint the wash on making sure not to apply to much and leave a patchy finish where it collects on the flat area.
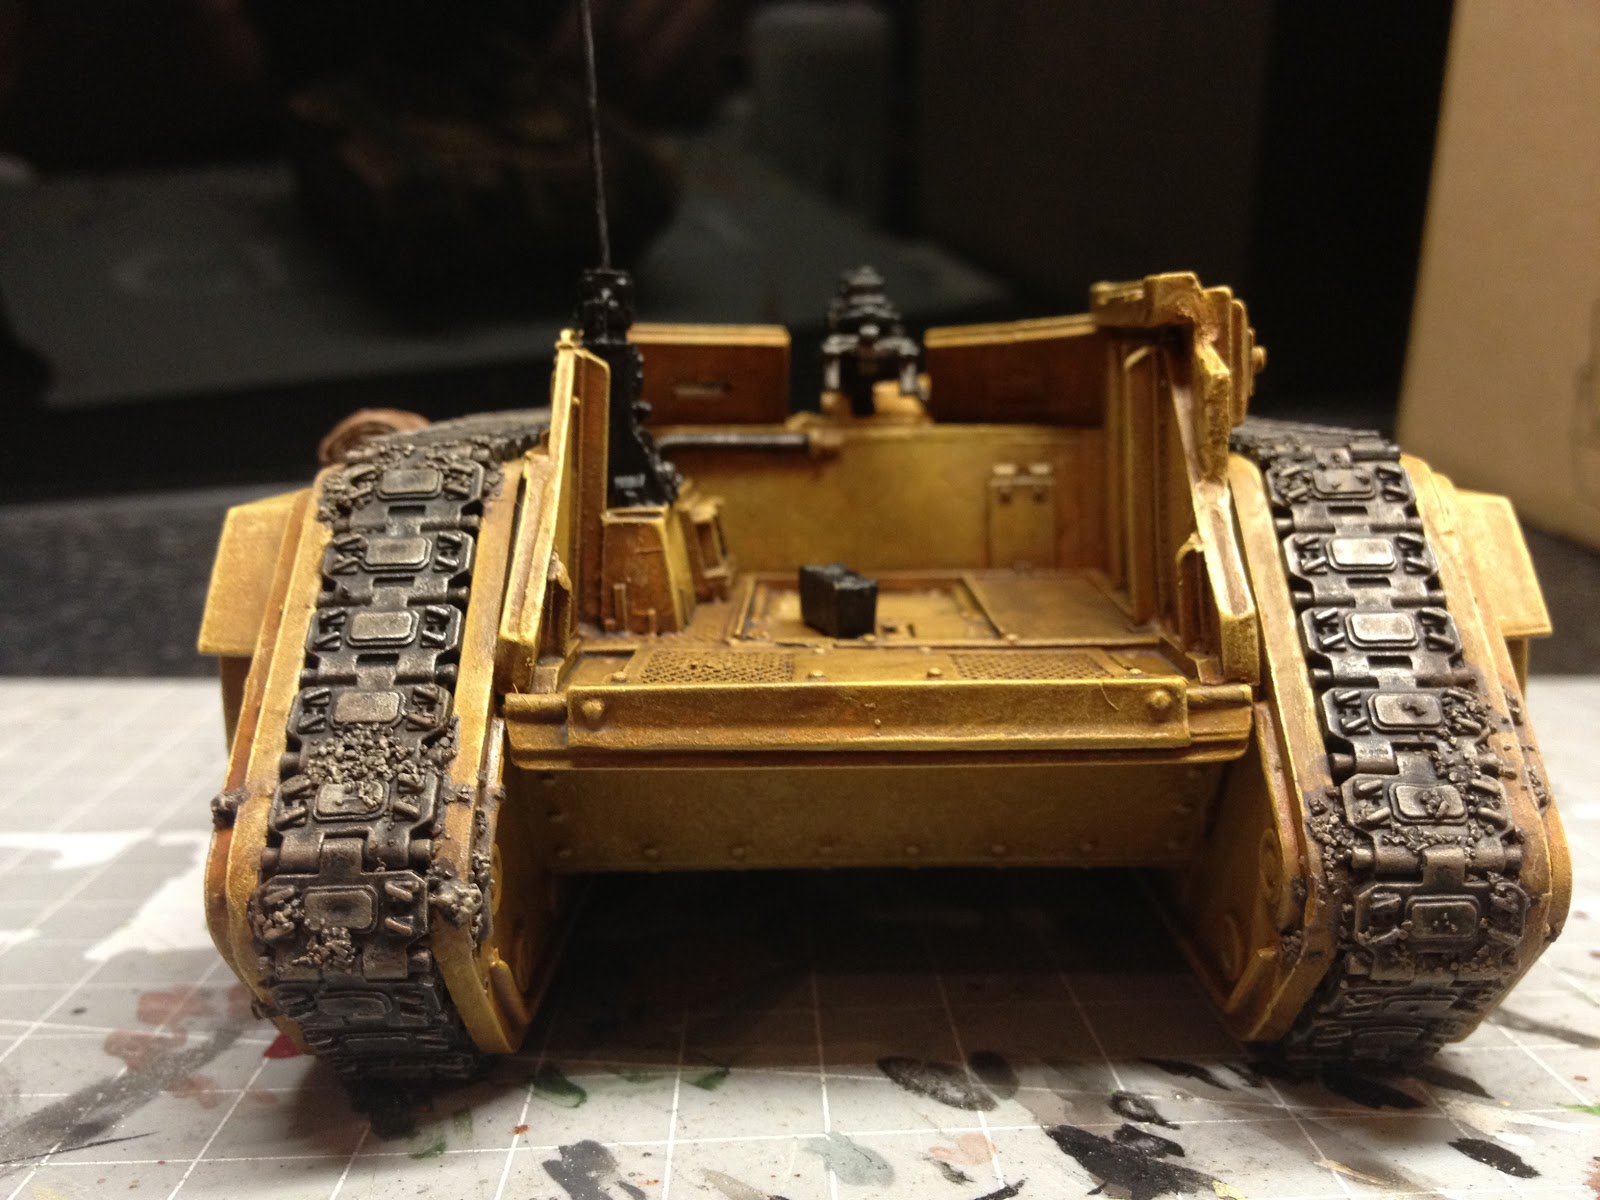
In the picture below I have added the tracks (I can never get them to fit properly and so always have to chop bits off the tracks where they can't be seen...). The tracks were sprayed black on the frame and drybrushed first with tin bitz and then boltgun metal and then chainmail, followed by a wash of 1:1 ogryn flesh and badab black. I then removed them from the frame with a knife added them to the tank and touched up any bare plastic with black.

Right thats the intro now on to the weathering! (you will also note that the rest of tank magically becomes more painted as the track weathering progresses!)
Step 1
I think the tracks always look better if they have picked up some dirt and look like they haven't just driven out of the showroom. When you add the weathering is up to you, at the end when everything else is painted works well or at a stage (like the salamander) when the surrounding area is done. So to achieve the look we go mix up PVA sand a little water. You want to have a bit less wet than my photo or else you could end up with a bit of PVA glaze!


Step 2
So now we have applied the weathering we need to paint it. It will take quite a while to dry so don't rush it. It should now look a little something like this. What with being sand on a sand coloured tank and transparent PVA glue not much to see but its certainly there.


Step 3
Now the drybrushing begins. For this I used a medium drybrush, remember with drybrushing you want to remove most of the paint from the brush, you can always drybrush the bit again if not enough paint was applied. I will post the next few pictures with the colour used, the lighter the colour the less paint on the brush, you want to build a depth of colour. Also get a little on the rest of tracks here and there as it looks good.
Drybrush colour one - Calthan Brown


Step 4
So your drybrushing should have also added a little bit of colour the tracks and might seem a little light in colour now. We want to bring it all together and add tone it down a bit. To do this we have another wash. This one is 2:1:1 badab black, ogryn flesh, water, apply to all of the tracks but do not wash the dirt, a little bit here and there is fine to mix it up but once again paint your wash on rather than haphazardly slapping it everywhere.

Final step
When your wash is fully dry (don't risk it when wet!!!) we apply our very last highlight in the form of some more drybrushing. This time we are going to drybrush chainmail on the tracks to bring the metal back to life. This is a very very light drybrush and it does not go everywhere, I tend to just put it on small areas here and there and mostly away from the dirtier parts.


There you go! Finished weathered tanks. The colours can be adapted to suit your needs but the method remain the same.
It might sound like a lot reading through but in practice it is very quick and easy to do, especially if you are doing a few tanks at once its very fast.
A few other examples of my other tanks, it is no problem if the colours, darkness, or amount of weathering vary from tank to tank, it all adds to the look!


Next step for the Salamander is to paint it and then add the battle damage and paint chips, I will add another how to post for that when I get it done.
I hope that was useful, it's a nice subtle weathering which adds to the look of the tank rather than being too obvious or drawing attention away from the tank itself. If you have any questions let me know!
Great tutorial! I tend to go for the 'off the showroom floor' look, but am always amazed at the end results of the various weathering techniques people do. Man, I really need to give it a go. Keep up the great work!
ReplyDeleteVery nice tutorial! I tend to go with the MiG weathering powders as I like the look it give's but can be a bit hit and miss at times. But I love what you have done and it doe's make your army look fantastic.
ReplyDeleteI guess for your chip work you go for a black undercoat then go over the top with Boltgun metal, which is then highlighted. Which is what I used to do and does look very effective especially with your army. I have now moved onto a sponge method which I can tell you how to do if you are ever interested.
I'm loving the work you are doing, and thanks for the comment on my sentinel.
Not quite on the chip work! You have to go for whatever your top highlight is on your armour first. So for my tanks it goes bleached bone, black, boltgun and done! No highlights needed and they really pop.
ReplyDeleteI think my painting is a bit old fashioned, while I was away from the hobby the times have changed, airbrushes, pigments and all manner of other things, I will have to give them all a try (at somepoint... paint and brush and Im a happy man!). But yes I'd be very interested in your sponge method.
Very nice effect with adding the texture to the model. I think it's something I'm going to keep in mind when I do some tanks myself. I tend to do what Commissar Dave does and just use powders, but I like the collection of dirt and debris this look can achieve.
ReplyDeleteRon, From the Warp
Congrats on the Warhammer 'What's New Today" spread! :D
ReplyDeletehttp://www.games-workshop.com/gws/wnt/blog.jsp?pid=1300020-gws
Also thanks for the cool tutorial, I cant wait to get back to my modelling.
Great tutorial and may I say once more, Congrats on making "What's New Today!"
ReplyDeleteBrilliant tutorial, thanks so much for this. I love your tanks and loved the dirt on the tracks so its great to see how you did it. I think my tanks are some way off but this has been bookmarked for when the time comes around!
ReplyDelete