A quick post to update you on my painting.
The final two bullgryns are almost done, and I hope to finish them tonight. Just a bit of freehand to do and few minor alterations to make.
Here they are with the friends and a commissar.
Need to get these fellas finished for a trip up to Warhammer World this weekend! Gorblud and I are having a 5K per side battle on one of their lovely fancy boards - Jmigan Bridge. If anyone who follows this blog is in the area by all means come along and say hi!
I think I'm also going to be paying a visit to Forge World for some new additions. A Gorgon has been mentioned and I'm sorely tempted...
Showing posts with label bullgryns. Show all posts
Showing posts with label bullgryns. Show all posts
Tuesday, 17 May 2016
Saturday, 14 May 2016
Finished Praetorian Bullgryns
Welcome to another post showing off a few of the new additions to the army.
This time we see a few more finished Bullgryns. I actually still have two more to do (with the slab shields) but this is now a finished legal unit of 3 so I thought I would show them off.
I'll also apologise for the photo quality in advance, my phone (which these are taken on) has a few issues and I don't have a working proper camera nor a good photo location at the moment... Far from ideal! Anyway, let's have a look,
Here the two fellas are with the above bits filled in. Also there was weathering on the armour and the tanks tracks. Its not immediately apparent but there is blue worked in to the silver on the Mauls around the power nodes (for want of a better explanation of what those long stick bits with a ball on the end that are on power weapons are).
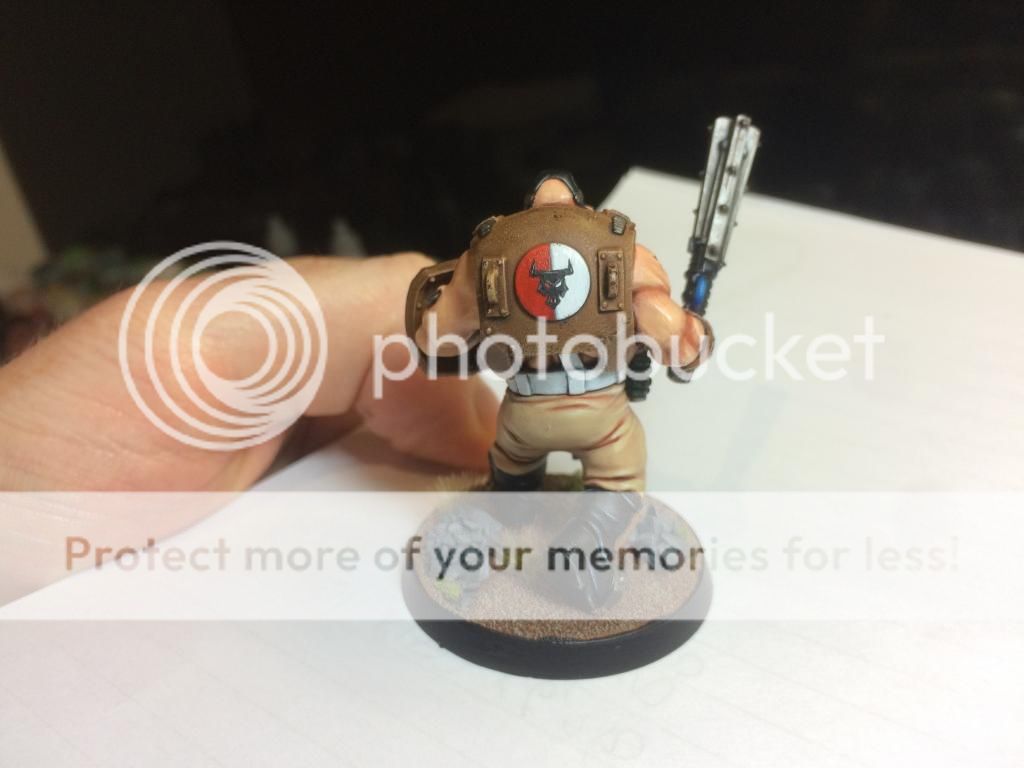
The one bit of freehand I allowed myself on these guys you will find on the (rather classic ork inspired, remember those old goffs anyone?) disc on the back of their armour. I have painted a bullgryn decal of sorts, which would find its way on to their eventual transport too (should they ever get one).
I absolutely love the Bullgryn models. I'd add more of them to the army in a heartbeat. Lots of fun to paint and they look great. I'd probably add some regular Ogryns if I have a moment of madness and buy some more. I've got the two with slab shields to finish first and they should be done within a week or two (and before the London GT in any case!)
This time we see a few more finished Bullgryns. I actually still have two more to do (with the slab shields) but this is now a finished legal unit of 3 so I thought I would show them off.
I'll also apologise for the photo quality in advance, my phone (which these are taken on) has a few issues and I don't have a working proper camera nor a good photo location at the moment... Far from ideal! Anyway, let's have a look,
Here we have what is probably the best photo of the newest two Bullgryns. Lets now turn to a WIP to see how we got them there.
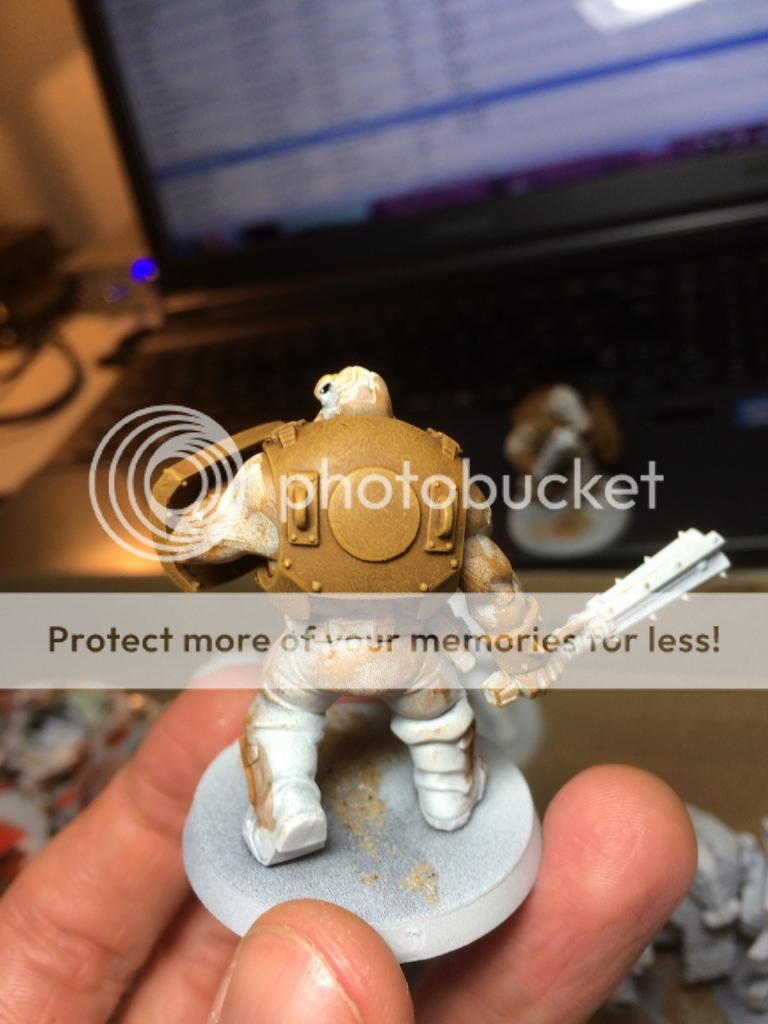
In this photos I still have the black to work on and the silver in the weapons. Bullgryns are relatively straightforward for me to paint palette wise with the armour painted like my tanks, and all the flesh and fatigues basecoated Cadian Fleshtone and then highlighted and layered accordingly.
Here the two fellas are with the above bits filled in. Also there was weathering on the armour and the tanks tracks. Its not immediately apparent but there is blue worked in to the silver on the Mauls around the power nodes (for want of a better explanation of what those long stick bits with a ball on the end that are on power weapons are).
The one bit of freehand I allowed myself on these guys you will find on the (rather classic ork inspired, remember those old goffs anyone?) disc on the back of their armour. I have painted a bullgryn decal of sorts, which would find its way on to their eventual transport too (should they ever get one).
A photo of the two of them reunited with their pal who I think I painted well over a year ago. I seem to have this annoying habit of not finishing units. Take my Lifeguards (based of of DKOK Grenadiers), I still only have five painted and they were painted over 4 years ago! But fear not they are now base coated and will get done eventually...
I absolutely love the Bullgryn models. I'd add more of them to the army in a heartbeat. Lots of fun to paint and they look great. I'd probably add some regular Ogryns if I have a moment of madness and buy some more. I've got the two with slab shields to finish first and they should be done within a week or two (and before the London GT in any case!)
To finish off we see the three of them lining up alongside a variety of other Praetorian Infantry. All infantry have now also been rebased to match and the army is looking so much better.
Up next will be a few photos of some more updated tanks with all manner of stowage, new weathering and new painted detail.
Please feel free to comment and let me know your thoughts!
Friday, 13 February 2015
Finished Bullgryn!
Thats right, one finished bullgryn. Just the one mind you I don't want to overdo it. Have a look at the photos below. Without blowing my own trumpet, I really like it!
He's a mean looking fellow isn't he? I weathered the armour in the exact same way as I go my tanks as essentially his armour is all made from a tank.

I've kept to the same colours as the rest of the army with the standard colour trousers and white detail on the eagle and belt etc. The power maul has a light blue glaze in the recess too to jazz it up.

It's been a while since I've had the chance to do much freehand painting so I made the most of the little circle by painting a bull/skull hybrid. I'm really pleased with how it turned out and it was done in 10/15 minutes max.

So there you have it. One finished bullgryn! Also note I've started adding slate coloured stones to the bases too, it's all a part of the big update for the army that is in progress...
In the next post there will be more finished models!
Thanks
He's a mean looking fellow isn't he? I weathered the armour in the exact same way as I go my tanks as essentially his armour is all made from a tank.

I've kept to the same colours as the rest of the army with the standard colour trousers and white detail on the eagle and belt etc. The power maul has a light blue glaze in the recess too to jazz it up.

It's been a while since I've had the chance to do much freehand painting so I made the most of the little circle by painting a bull/skull hybrid. I'm really pleased with how it turned out and it was done in 10/15 minutes max.

So there you have it. One finished bullgryn! Also note I've started adding slate coloured stones to the bases too, it's all a part of the big update for the army that is in progress...
In the next post there will be more finished models!
Thanks
Monday, 5 January 2015
Bullgryn Update
Happy new year to everyone!
Here's the first of many many more posts this year. I've made a number of resolutions to myself this year and one of them is to get back to hobbying and blogging!
The bullgryns will be the first project of the new year and at the same time I'm going to review my blog and have a think about updating all the various parts of it.
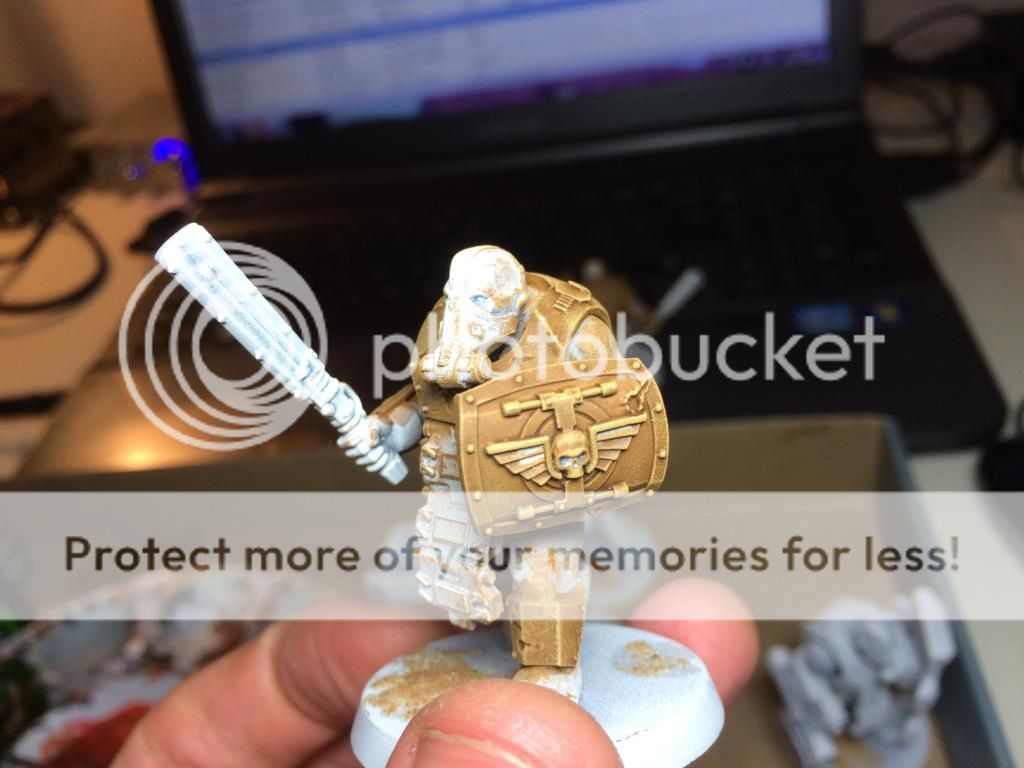
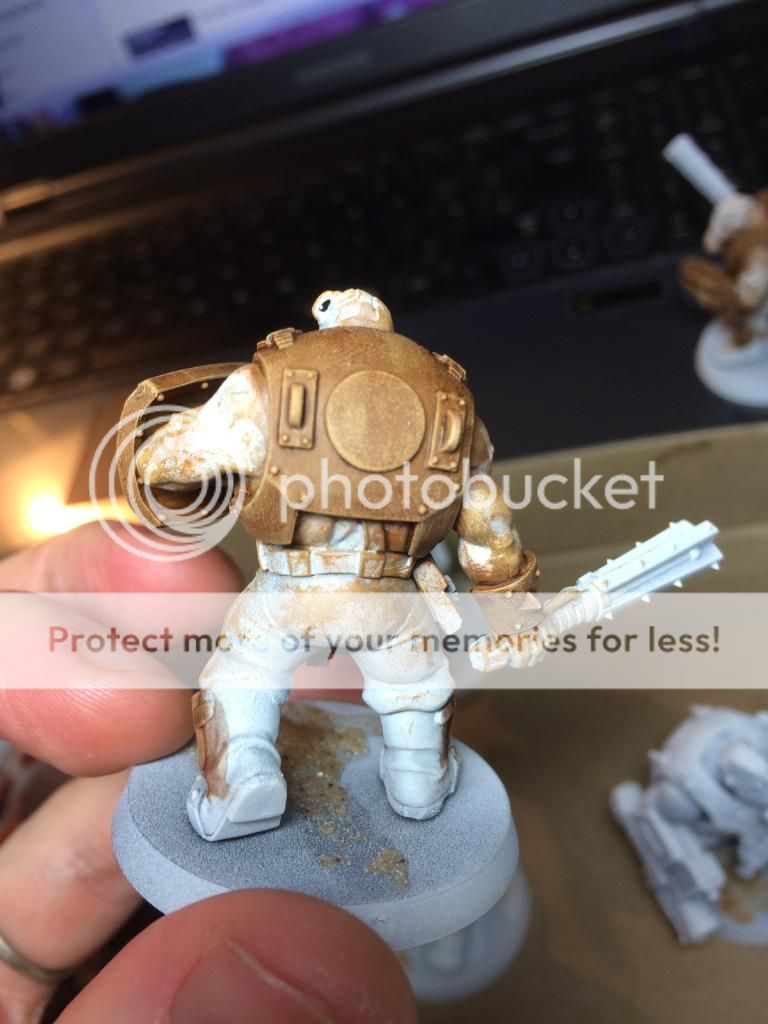
To kick us off her is the latest WIP photo of the bullgryn. He is the test bullgryn so is currently being worked on solo, however when I then go on to paint the other 4 and Nork I will post tutorials for the other aspects of the model. In the last post I covered the armour and the trousers.
In the above picture you will see that the skin is now painted with the eyes simply shaded for the time being. The grey will eventually be white like the rest of the belts etc on the army and the rest of the model has been undercoated black.
I've learnt a lot from this model already and know some mistakes I need to avoid when painting the rest of the squad. The armour makes painting some parts of the model an absolute nightmare as there is detail buried in the cracks. To avoid this on the future models I am going to consider having a second black undercoat in between the gas mask and the armour/neck so that at least no white shows through.
Hopefully the next post will show this guy fully painted and then the posts that follow showing the steps on the rest of the squad.
Thanks for reading!
Thursday, 18 December 2014
Bullgryn WIP with painting steps
Hello everyone!
I am finally reunited with my paints and some of my models! Hurrah!
Some brave guardsmen and some bone 'eaded bullgryns traversed the wintery wasteland of the Terran continent Europa Majoris and have safely arrived at their new barracks. Their journey was inexplicably delayed for several weeks due to warps storms and they have been screened for heresy by the commisariat.
There is plenty finally for me to paint in my new home and so tonight I decided to get back to it and to get started on something a little different with the bullgryns.

There are going to be a lot of photos following which show stage by stage the process on a couple of ogryn so words will be sparse until the end. I'll include the brush and paint details as I go however.
I gave the colour scheme some though and eventually settled on mixing my tank painting with my infantry painting. All the big armour was going to be painted in the same method as my tanks and the fatigues in the same colours as the infantry. A bold move. Would it work? lets find out...

Stage 1 XV88
I used a nunber 2 windsor newton brush for this model unless otherwise specified. It's one of the larger brushes but keeps a great point. I'm not such a fan of smaller brushes.


50/50 mix reikland fleshshade and nuln oil


Paints just in case we forget what they look like...

Drybrush of XV88 using the GW tank brush.


Drybrush of Baylor brown using the GW tank brush


Drybrush of Ushabti bone using the GW tank brush (wait does the tank brush still exist? Its essentially a very large drybrush).


Washed once again with the 50/50 mix used earlier


Cadian fleshtone (tallarn flesh's replacement though I'm not entirely sold on it). Don't worry I'm not painting him naked, I used the same base colour for the skin as the uniforms. I find it works well and makes my infantry that bit quicker and easier.


It looks like I missed a stage. Apply reikland fleshshade to the model and then when dry apply a 50/50 cadian fleshtone, ushabti bone mix leaving the washed colour in the recesses.

Now use ushabti bone to highlight.


and finally add some white to the ushabti bone for the final highlight.

There you go that's where we are up to for now. I'm pleased so far, when I start adding in the black and paint the flesh it'll really come together.
The plan will be to weather the armour just like my tanks too. All the belts etc will be white like my infantry and there will be some red somewhere as its another of my colours for the army.
Word of advice if you decide to paint up some bulglryns, their poses are a pain for painting as it leaves lots of almost impossible bits to reach, particularly with the armour as it clips on like a shell over the usual torso. Try and paint it off if possible but it would mean having the model armless too due to the way it is constructed.
I hope this was both useful and interesting. If you would like me to post the next part in the same manner please do let me know. It'll likely be two weeks before that will happen due to Christmas and the fact I will once again be in a different country to my hobby stuff... Bah humbug.
If I don't post again before, Merry Christmas everyone!
I am finally reunited with my paints and some of my models! Hurrah!
Some brave guardsmen and some bone 'eaded bullgryns traversed the wintery wasteland of the Terran continent Europa Majoris and have safely arrived at their new barracks. Their journey was inexplicably delayed for several weeks due to warps storms and they have been screened for heresy by the commisariat.
There is plenty finally for me to paint in my new home and so tonight I decided to get back to it and to get started on something a little different with the bullgryns.

There are going to be a lot of photos following which show stage by stage the process on a couple of ogryn so words will be sparse until the end. I'll include the brush and paint details as I go however.
I gave the colour scheme some though and eventually settled on mixing my tank painting with my infantry painting. All the big armour was going to be painted in the same method as my tanks and the fatigues in the same colours as the infantry. A bold move. Would it work? lets find out...

Stage 1 XV88
I used a nunber 2 windsor newton brush for this model unless otherwise specified. It's one of the larger brushes but keeps a great point. I'm not such a fan of smaller brushes.


50/50 mix reikland fleshshade and nuln oil


Paints just in case we forget what they look like...

Drybrush of XV88 using the GW tank brush.


Drybrush of Baylor brown using the GW tank brush


Drybrush of Ushabti bone using the GW tank brush (wait does the tank brush still exist? Its essentially a very large drybrush).


Washed once again with the 50/50 mix used earlier


Cadian fleshtone (tallarn flesh's replacement though I'm not entirely sold on it). Don't worry I'm not painting him naked, I used the same base colour for the skin as the uniforms. I find it works well and makes my infantry that bit quicker and easier.


It looks like I missed a stage. Apply reikland fleshshade to the model and then when dry apply a 50/50 cadian fleshtone, ushabti bone mix leaving the washed colour in the recesses.

Now use ushabti bone to highlight.


and finally add some white to the ushabti bone for the final highlight.

There you go that's where we are up to for now. I'm pleased so far, when I start adding in the black and paint the flesh it'll really come together.
The plan will be to weather the armour just like my tanks too. All the belts etc will be white like my infantry and there will be some red somewhere as its another of my colours for the army.
Word of advice if you decide to paint up some bulglryns, their poses are a pain for painting as it leaves lots of almost impossible bits to reach, particularly with the armour as it clips on like a shell over the usual torso. Try and paint it off if possible but it would mean having the model armless too due to the way it is constructed.
I hope this was both useful and interesting. If you would like me to post the next part in the same manner please do let me know. It'll likely be two weeks before that will happen due to Christmas and the fact I will once again be in a different country to my hobby stuff... Bah humbug.
If I don't post again before, Merry Christmas everyone!
Subscribe to:
Posts (Atom)


.JPG)
