I think banners are pretty important for an Imperial Guard army, I'm not sure how useful they really are in a game of 40k but I certainly couldn't imagine my Praetorian's going to battle without waving at least a few of them.
Banners have been made pretty easy in recent years with great plastic banners that take a lot of the hard work out of painting them. When I first started my Praetorian army a year or two afte their release I had paper banners and it was Union flags all the way. However when I revisited the army a couple of years before my long absence I moved towards proper Imperial Guard banners, and also away from paper banners. This was before the plastic banners were released and so my first inspiration was from the metal cadian command squad.
I copied the size and shape of the banner in greenstuff and also added some detail with purity seals, rope, and a few other things. I also copied the general colour scheme of white black and red with some free hand details like the IV and the unicorn head (a motif which features on a lot of the vehicles in the army).
So now that I have returned to the hobby I wanted to pick up where I left of with regards to banners and try to make them a highlight of the army. The first one that I have now completed is the Rough Rider standard. The banner is taken from Empire Knights with the staff removed, holes drilled and a brass rod put in its place. The head of the standard is the Praetorian one (which all my banners will have) found on the metal standard bearer and the rope is green stuff around the top and the bits from the plastic Guard command sprue.
So this one was certainly a challenge to paint. Entirely flat surfaces with alot of folds and changes in angle, this required some planning, and so plan I did.
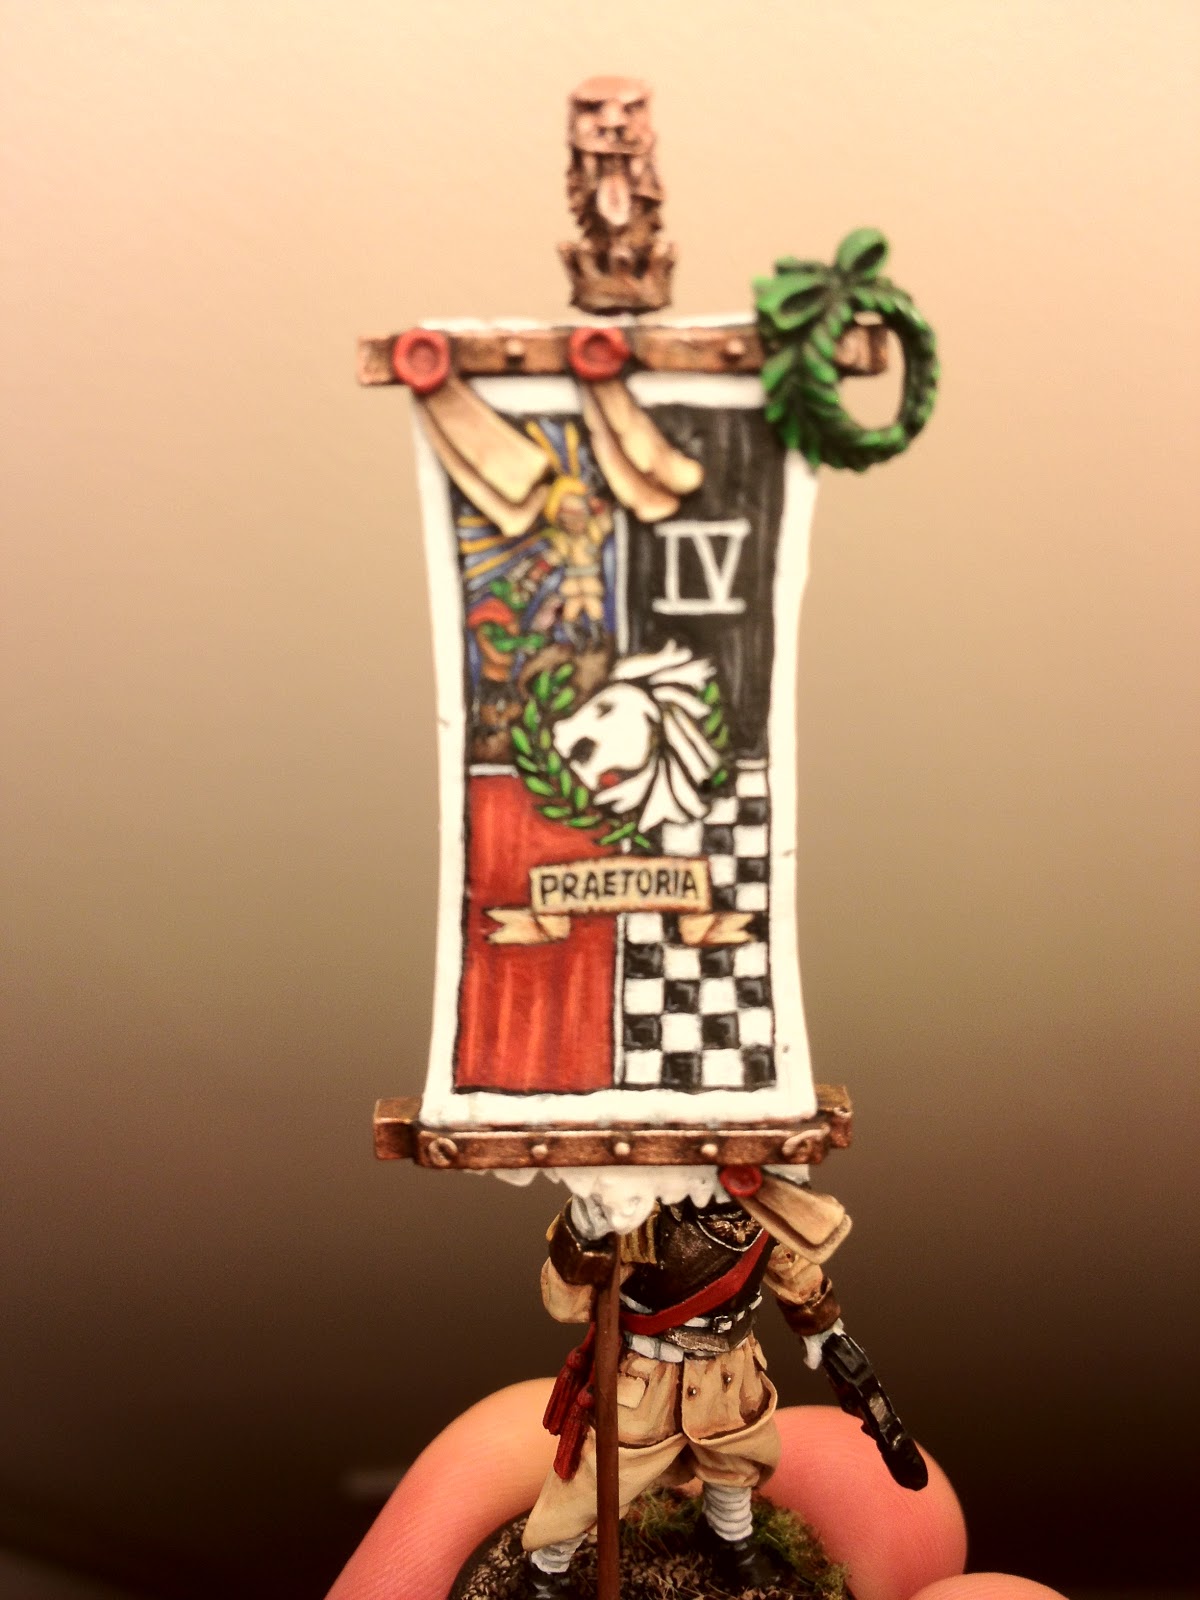
I think the key to good free hand painting is preparation. You need to have a very cleay idea of what you are painting and how you will paint it. So before I began paiting I spent a while drawing ideas and doodling to see what I liked the look of, also I wanted to understand the folds of the banner so I knew how it would work. I was already settled on having a IV in a laurel wreath at the top of the banner and Praetoria written towards the end, in the middle I wanted some kind of Lion. I decided to have a leaping Lion which would work well with the length of the banner and also tie in with the overall lion praetorian connection.
The next thing to consider was the reverse of the banner. Painting all of the things I mentioned above once was going to be tough enough, but twice and to get them the same! Too much work I reckon so I decided to have a simple striped reverse using more red to stay within the white, red, balck palette. A few more IVs and Aquilla thrown in and there you go! The whole thing was pencil drawn on first before being picked out in white (if in doubt paint over the lines or if you want to change it as it is easy to change with black again after). The white was given a few very thin coats to build up the colour before all the black was painted again, being careful to neaten all the edges ofthe white and get everything perfect. The black was then highlighted and other colours added over the white where needed. All in all it took about 4 hours from drawing on the banner to finishing painting.
As a sneak peak of what is to come the next banner I'm going to paint will be the Command HQ. The rectangle banners on the drawings above were for this banner and I was looking forward to having only one flat surface to contend with! Here is the model with an initial pencil banner drawn on...