A couple weeks overdue, but here are a few photos of what I managed to get done for the LGT. All of the below was painted in the space of two weeks!
A few WIP (apologies for the somewhat jumbled order, it was a mad dash to paint them and the photos show that!) photos along the way along with the finished models. The new tanks all need to be weathered and the Land Raider needs some free hand love, but otherwise they are all done.
Enjoy!
Showing posts with label Tanks. Show all posts
Friday, 1 June 2018
Tuesday, 8 May 2018
Tankageddon - Painting update
A quick post for today with an update on my tank painting.
Rather ambitiously I have 5 tanks to paint before the LGT Horus Heresy on 19th and 20th May 2018. As it stands I have 10 days...
Not only do I have to paint those tanks, but also a load of infantry. Anyway one musn’t grumble, Praetorian stiff upper lip and all that, lets get it all done! Huzzah!
Here are the tanks as they currently stand. The main colour is done bar one final wash which makes them a little less yellow and gives them a nice finish. Next step will be the tracks and anything black/metal. I may have to take a view on tank markings and save that for a later date, priority will be get enough finished and then get stuck into the infantry.
Wish me luck!
Rather ambitiously I have 5 tanks to paint before the LGT Horus Heresy on 19th and 20th May 2018. As it stands I have 10 days...
Not only do I have to paint those tanks, but also a load of infantry. Anyway one musn’t grumble, Praetorian stiff upper lip and all that, lets get it all done! Huzzah!
Here are the tanks as they currently stand. The main colour is done bar one final wash which makes them a little less yellow and gives them a nice finish. Next step will be the tracks and anything black/metal. I may have to take a view on tank markings and save that for a later date, priority will be get enough finished and then get stuck into the infantry.
Wish me luck!
Monday, 9 February 2015
WIP Imperial Guard Trojan tank conversion
A quick Monday night photo update of my latest project!
I seem to be flitting from various things in the army at the moment without actually finishing anything!
At present I am updating all my tanks with stowage and extra bits being painted. It's really making the old chimeras look a lot better so I'm very pleased.
This post however, is about a Trojan that I am converting after buying a chimera and raiding my bits box. The other day I decided to purchase the new 7th edition rule book. That shopping trip ended up with me buying a chimera and no rulebook. Something went horribly wrong... Or is that right?
I've built the mainstay and have various green stuff to add along with the final grabber or cable on the crane. Also I need to do rivets to keep it in line with the rest of the tank. Anyway here are the photos enjoy!
There is an icredible variety of IG bits from over the years on this tank, while you look at the picks, see if you can identify a few.
What I would love from you all is some feedback on how it looks so far and any suggestions you may have on what else to add or even remove. Additionally can anyone give me tips on how to make quick, easy and consistent rivets.
Cheers!
I seem to be flitting from various things in the army at the moment without actually finishing anything!
At present I am updating all my tanks with stowage and extra bits being painted. It's really making the old chimeras look a lot better so I'm very pleased.
This post however, is about a Trojan that I am converting after buying a chimera and raiding my bits box. The other day I decided to purchase the new 7th edition rule book. That shopping trip ended up with me buying a chimera and no rulebook. Something went horribly wrong... Or is that right?
I've built the mainstay and have various green stuff to add along with the final grabber or cable on the crane. Also I need to do rivets to keep it in line with the rest of the tank. Anyway here are the photos enjoy!
There is an icredible variety of IG bits from over the years on this tank, while you look at the picks, see if you can identify a few.
What I would love from you all is some feedback on how it looks so far and any suggestions you may have on what else to add or even remove. Additionally can anyone give me tips on how to make quick, easy and consistent rivets.
Cheers!
Wednesday, 15 February 2012
Praetorian Command HQ Chimera
Photos of the finished Command HQ Chimera. Colonel Winterborne's personal transport with plenty of free hand insignia and extra armour.
Tuesday, 7 February 2012
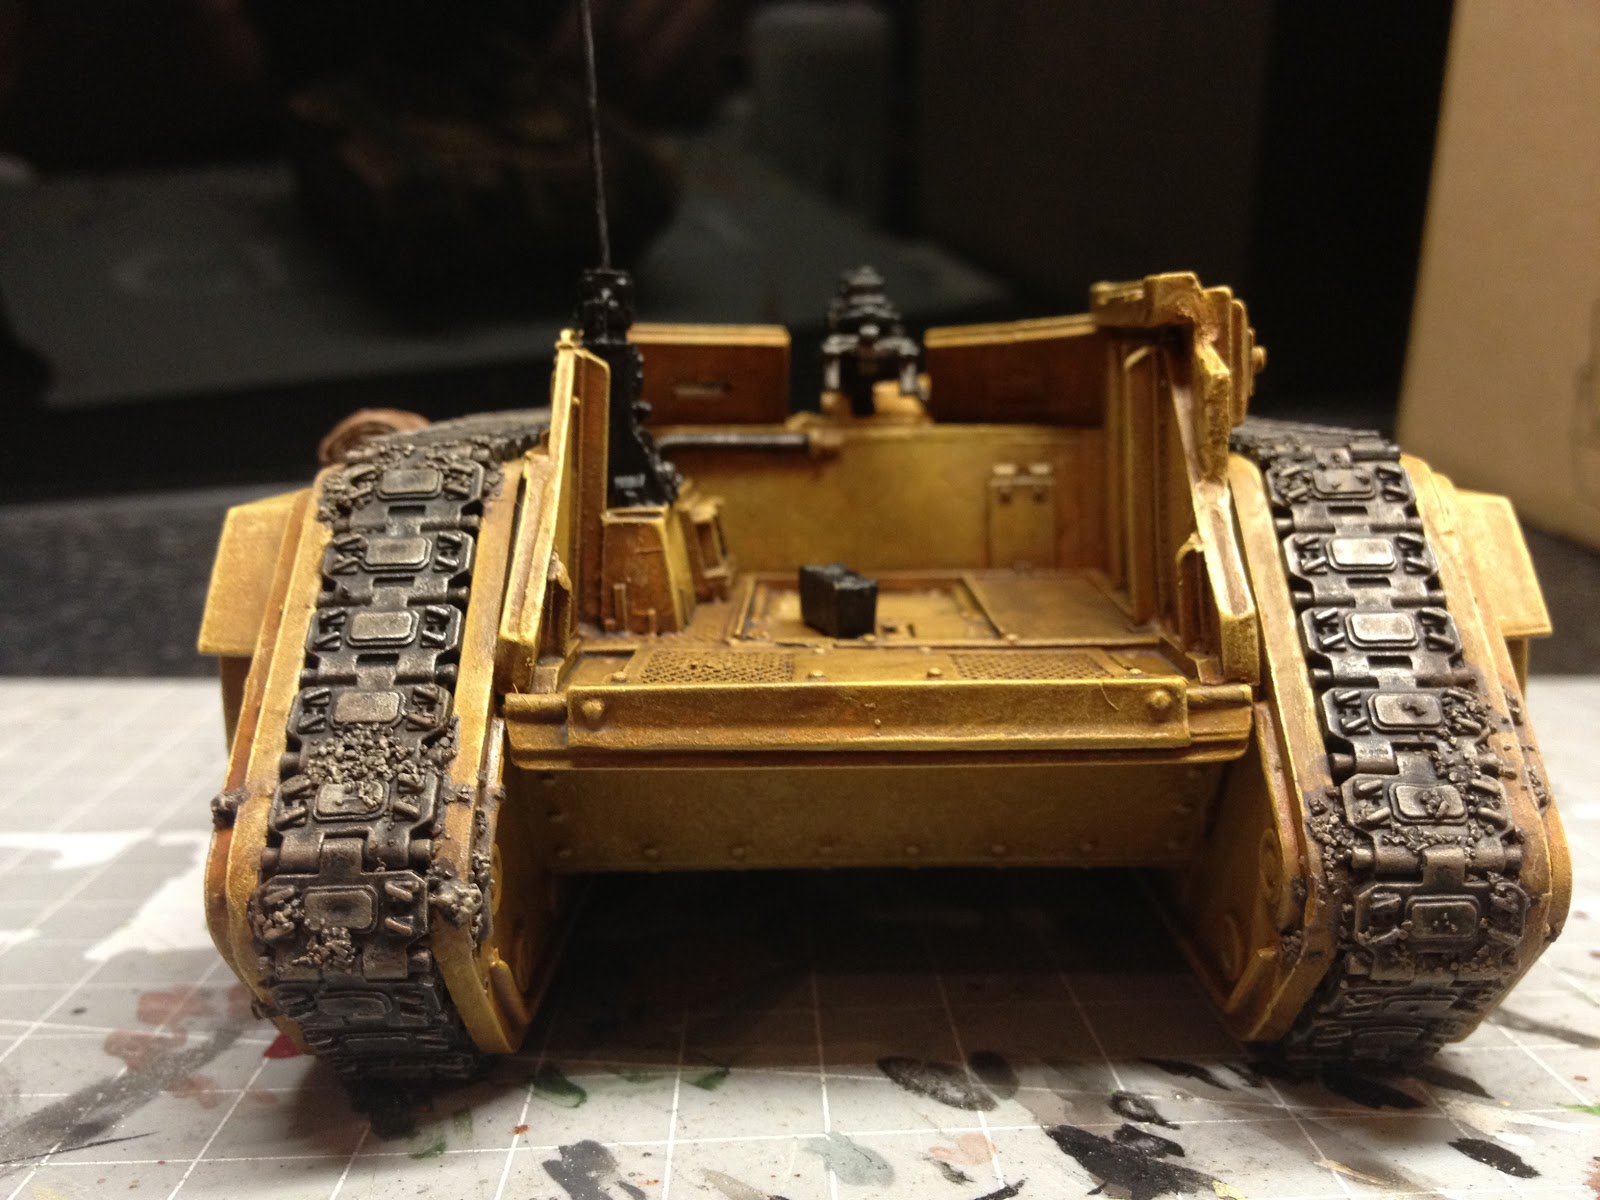
A Praetorian guide to tank track weathering
Followers of my blog will know that recently the poor guardsmen have been overlooked in favour of finishing off a lot of armour and painting lots of chips and damage to the paint work and weathering on the tracks. The current tank being painted is my command Salamander, when I last left it (see the old post) I had finished the main colour of the tank.
Since then Ive painted the black parts and given the whole hull a wash of 1:1:1 water ogryn flesh and badab black where I was carfeul to paint the wash on making sure not to apply to much and leave a patchy finish where it collects on the flat area.
In the picture below I have added the tracks (I can never get them to fit properly and so always have to chop bits off the tracks where they can't be seen...). The tracks were sprayed black on the frame and drybrushed first with tin bitz and then boltgun metal and then chainmail, followed by a wash of 1:1 ogryn flesh and badab black. I then removed them from the frame with a knife added them to the tank and touched up any bare plastic with black.
Right thats the intro now on to the weathering! (you will also note that the rest of tank magically becomes more painted as the track weathering progresses!)
Step 1
I think the tracks always look better if they have picked up some dirt and look like they haven't just driven out of the showroom. When you add the weathering is up to you, at the end when everything else is painted works well or at a stage (like the salamander) when the surrounding area is done. So to achieve the look we go mix up PVA sand a little water. You want to have a bit less wet than my photo or else you could end up with a bit of PVA glaze!
Now you apply it to the tracks where you want the dirt to be. Think about where it might have collected on the hull and skirts of the tank, you can use it to hide errors and cover up parts where the tracks dont join quite right. I tend to place it pretty evenly around the whole track never leaving too big a gap, I also have it collecting along the skirts and towards the back . I would avoid going too crazy and putting lots and lots on but each to their own!
Step 2
So now we have applied the weathering we need to paint it. It will take quite a while to dry so don't rush it. It should now look a little something like this. What with being sand on a sand coloured tank and transparent PVA glue not much to see but its certainly there.
The base colour for my weathering is 1:1 chaos black and scorched brown (depending on your bases for the rest of your army you could paint it different colour), you want it watered down somewhere in between a wash and paint from the pot, you want it to apply well but also be opaque so you dont see the sand colour through it. Paint it on generously but stick to the sand as much as possible. Dont be afraid to paint this colour on the tank a little as with the following drybrushing it will all come together.
Step 3
Now the drybrushing begins. For this I used a medium drybrush, remember with drybrushing you want to remove most of the paint from the brush, you can always drybrush the bit again if not enough paint was applied. I will post the next few pictures with the colour used, the lighter the colour the less paint on the brush, you want to build a depth of colour. Also get a little on the rest of tracks here and there as it looks good.
Drybrush colour one - Calthan Brown
Drybrush colour two - Khemri brown
Drybrush colour 3 - Komando Khaki
Final drybrush colour - Bleached bone (possibly the most useful paint for my army there is!)
Step 4
So your drybrushing should have also added a little bit of colour the tracks and might seem a little light in colour now. We want to bring it all together and add tone it down a bit. To do this we have another wash. This one is 2:1:1 badab black, ogryn flesh, water, apply to all of the tracks but do not wash the dirt, a little bit here and there is fine to mix it up but once again paint your wash on rather than haphazardly slapping it everywhere.
Final step
When your wash is fully dry (don't risk it when wet!!!) we apply our very last highlight in the form of some more drybrushing. This time we are going to drybrush chainmail on the tracks to bring the metal back to life. This is a very very light drybrush and it does not go everywhere, I tend to just put it on small areas here and there and mostly away from the dirtier parts.
There you go! Finished weathered tanks. The colours can be adapted to suit your needs but the method remain the same.
It might sound like a lot reading through but in practice it is very quick and easy to do, especially if you are doing a few tanks at once its very fast.
A few other examples of my other tanks, it is no problem if the colours, darkness, or amount of weathering vary from tank to tank, it all adds to the look!
Next step for the Salamander is to paint it and then add the battle damage and paint chips, I will add another how to post for that when I get it done.
I hope that was useful, it's a nice subtle weathering which adds to the look of the tank rather than being too obvious or drawing attention away from the tank itself. If you have any questions let me know!
Since then Ive painted the black parts and given the whole hull a wash of 1:1:1 water ogryn flesh and badab black where I was carfeul to paint the wash on making sure not to apply to much and leave a patchy finish where it collects on the flat area.
In the picture below I have added the tracks (I can never get them to fit properly and so always have to chop bits off the tracks where they can't be seen...). The tracks were sprayed black on the frame and drybrushed first with tin bitz and then boltgun metal and then chainmail, followed by a wash of 1:1 ogryn flesh and badab black. I then removed them from the frame with a knife added them to the tank and touched up any bare plastic with black.
Right thats the intro now on to the weathering! (you will also note that the rest of tank magically becomes more painted as the track weathering progresses!)
Step 1
I think the tracks always look better if they have picked up some dirt and look like they haven't just driven out of the showroom. When you add the weathering is up to you, at the end when everything else is painted works well or at a stage (like the salamander) when the surrounding area is done. So to achieve the look we go mix up PVA sand a little water. You want to have a bit less wet than my photo or else you could end up with a bit of PVA glaze!
Now you apply it to the tracks where you want the dirt to be. Think about where it might have collected on the hull and skirts of the tank, you can use it to hide errors and cover up parts where the tracks dont join quite right. I tend to place it pretty evenly around the whole track never leaving too big a gap, I also have it collecting along the skirts and towards the back . I would avoid going too crazy and putting lots and lots on but each to their own!
Step 2
So now we have applied the weathering we need to paint it. It will take quite a while to dry so don't rush it. It should now look a little something like this. What with being sand on a sand coloured tank and transparent PVA glue not much to see but its certainly there.
The base colour for my weathering is 1:1 chaos black and scorched brown (depending on your bases for the rest of your army you could paint it different colour), you want it watered down somewhere in between a wash and paint from the pot, you want it to apply well but also be opaque so you dont see the sand colour through it. Paint it on generously but stick to the sand as much as possible. Dont be afraid to paint this colour on the tank a little as with the following drybrushing it will all come together.
Step 3
Now the drybrushing begins. For this I used a medium drybrush, remember with drybrushing you want to remove most of the paint from the brush, you can always drybrush the bit again if not enough paint was applied. I will post the next few pictures with the colour used, the lighter the colour the less paint on the brush, you want to build a depth of colour. Also get a little on the rest of tracks here and there as it looks good.
Drybrush colour one - Calthan Brown
Drybrush colour two - Khemri brown
Drybrush colour 3 - Komando Khaki
Final drybrush colour - Bleached bone (possibly the most useful paint for my army there is!)
Step 4
So your drybrushing should have also added a little bit of colour the tracks and might seem a little light in colour now. We want to bring it all together and add tone it down a bit. To do this we have another wash. This one is 2:1:1 badab black, ogryn flesh, water, apply to all of the tracks but do not wash the dirt, a little bit here and there is fine to mix it up but once again paint your wash on rather than haphazardly slapping it everywhere.
Final step
When your wash is fully dry (don't risk it when wet!!!) we apply our very last highlight in the form of some more drybrushing. This time we are going to drybrush chainmail on the tracks to bring the metal back to life. This is a very very light drybrush and it does not go everywhere, I tend to just put it on small areas here and there and mostly away from the dirtier parts.
There you go! Finished weathered tanks. The colours can be adapted to suit your needs but the method remain the same.
It might sound like a lot reading through but in practice it is very quick and easy to do, especially if you are doing a few tanks at once its very fast.
A few other examples of my other tanks, it is no problem if the colours, darkness, or amount of weathering vary from tank to tank, it all adds to the look!
Next step for the Salamander is to paint it and then add the battle damage and paint chips, I will add another how to post for that when I get it done.
I hope that was useful, it's a nice subtle weathering which adds to the look of the tank rather than being too obvious or drawing attention away from the tank itself. If you have any questions let me know!
Subscribe to:
Posts (Atom)